Really good low fodmap gravy


Now gravy is a very important piece of my happiness pie. There’s no such thing as too much gravy and the idea of a dry roast dinner is just wrong. Wrong.

But since going low fodmap, gravy is pretty much out of bounds.

Most people make it using flour as a thickener or granules for their quick gravy fix. But due to the wheat content (and usually the onion or garlic powder mixed in) this is a no no for us fodmappers.

But I have a solution! My dad always made gravy for our Sunday roast using a bit of stock, the meat juices and some cornflour. You could really taste the true flavour of that meaty goodness. It was (and still is) delicious and more importantly low fodmap!

For my recipe, I’ve added a splash of wine and a knob of butter for a bit of extra richness, not that I’m trying to improve on perfection!

Now you never have to suffer a dry roast again!

Ingredients

  • 500ml low fodmap stock (there’s a recipe for this a few blog posts down) 
  • Meat juices if you’re cooking a roast (optional – leave out if veggie)
  • A splash of red or white wine (optional – red for red meats, white for white meats)
  • A knob of butter
  • 1tbsp cornflour

Optional: depending on the flavour I want I sometimes add a teaspoon of tomato purée or yeast extract to give a richer flavour. (If you buy the shop’s own brand yeast extract it’s usually barley free but branded marmite isn’t low fodmap).

Method

  1. Pour stock, wine and meat juices into a saucepan ( I prefer a wide, shallow saucepan as it helps the gravy reduce faster) and simmer until slightly reduced. You can reduce the wine first but as we’re only adding a splash it’s not too important.
  2. Mix the cornflour with 2-3 tbsp of water and mix until lump free. Don’t worry too much about quantities as you can always add a bit more if your gravy isn’t thick enough.
  3. Wait until the stock has reduced slightly and is simmering then pour in the cornflour mixture whilst continuously stirring to avoid lumps. It’s important that the stock is hot enough otherwise the cornflour won’t be absorbed.

Melt in a small knob of butter for richness then serve!

Low fodmap minestrone soup


I’ve always loved a good chunky vegetable broth. It’s so comforting and packed full of goodness . My Baba (Ukrainian grandmother) makes the BEST vegetable and noodle soup! It’s like medicine for the soul.

Minestrone soup makes me feel the same way. So much love, attention and honest, simple ingredients go into making it. There are so many different ways of making it and hundreds of different family recipes but this recipe is my way. 

Ingredients

  • 500g Passata
  • 1 tbsp tomato purée
  • 1 tbsp Garlic infused oil
  • Half a swede
  • 3 carrots
  • 150g gluten free pasta
  • 2 courgettes
  • 2 red peppers
  • 1/2 tbsp dried basil 
  • 1/2 tbsp oregano
  • 1/2 tbsp smoked paprika
  • 100ml white wine
  • Low fodmap stock – enough to cover
  • 1 tsp sugar
  • 3 tsp cornflour 
  • 3 leaves of spring greens
  • Fresh basil (optional)

Method

  1. Dice all of the veg and throw them into a deep casserole dish or saucepan.
  2. Tip in all of the other ingredients except for the pasta and the cornflour. Pour over enough stock to cover everything.
  3. Simmer until the veg is soft then tip in the pasta.
  4. Once the pasta is cooked, mix the cornflour with a splash of water then slowly pour into the soup whilst stirring continuously.
  5. Check the seasoning and mix in some salt and pepper if you fancy it! 

Enjoy! It’s great to take as a packed lunch to reheat at work and will last up to 5 days in the fridge! 

Low fodmap creamy mushroom risotto


I LOVE risotto. That creamy, comforting, steaming bowl of yum that fills you up just right.

Making a beautiful risotto is so easy but filled with cream, garlic and onion it’s definitely not low fodmap.

Well I’ve come up with a recipe that’s both low fodmap and still tastes like that gooey, ricey goodness that we all love! Enjoy!


Ingredients

  • 2 tbsp garlic infused oil
  • The green tops of 6 spring onions
  • 400g Arborio rice
  • 1.1 litres of low fodmap stock (see previous post on stock)
  • 2 glasses of white wine
  • 30g dried porcini mushrooms (porcini mushrooms are low fodmap in small servings so 15g per person or less will be safe)
  • 90g Parmesan
  • Butter
  • Salt and pepper
  • A handful of fresh parsely

Serves 6

Method

  1. Prepare porcini mushrooms: Place dried porcini mushrooms in a bowl with 1 cup boiling water. Weight down the mushrooms with something so they stay submerged for 30 minutes. After 30 minutes, squeeze mushrooms (saving all liquid) and chop porcini mushrooms coarsely.
  1. Heat the stock and mix with the mushroom liquid. Finely chop the spring onion ends. Finely grate the Parmesan.
  2. In a separate pan, heat the garlic infused oil and 1 small knob of butter over a low heat. (Usually you would fry the onions and garlic here but the spring onions ends will burn too quickly so I just add them in with the rice.)
  3. Add the rice and spring onions and turn up the heat – the rice will now begin to lightly fry, so keep stirring it. After 1 minute it will look slightly translucent. Add the wine and keep stirring.
  4. Once the wine has cooked into the rice, add your first ladle of hot stock along with the mushrooms and a good pinch of sea salt. Turn the heat down to a simmer so the rice doesn’t cook too quickly on the outside.
  5. Keep adding ladlefuls of stock, stirring, allowing each ladleful to be absorbed before adding the next. This will take around 15 minutes. Carry on adding stock until the rice is soft but with a slight bite. Don’t forget to check the seasoning carefully. If you run out of stock before the rice is cooked, add some boiling water.
  6. Remove the pan from the heat, add 1 knob of butter, the parsley and the Parmesan, then stir well.
  7. Place a lid on the pan and allow to sit for 2 minutes – this is the most important part of making the perfect risotto, as this is when it becomes creamy and oozy like it should be. Serve. This also makes a great leftover lunch!

Low fodmap stock


It’s nearly impossible to find low fodmap stock at the supermarket and making your own can sometimes seem a bit of an effort but I’ve come up with super easy recipe that will add tonnes of flavour with none of the stomach ache and doesn’t use lots of expensive ingredients. In fact it’s a great way to use up your Sunday roast left overs!

Ingredients

  • Chicken carcass or any other bones you like
  • 2 Carrots
  • 100g Celeriac (instead of celery which isn’t low fodmap)
  • 2 bay leaves
  • A big bunch of fresh dill
  • The green tops of 6 spring onions (only the green bit if low fodmap)
  • 1 tbsp peppercorns
  • 1 tsp salt

Method

Throw all of the ingredients into a deep pan or slow cooker. Pour in enough water to cover everything and simmer gently. If you’re doing it in a pan 1-2 hours should be enough. If I’m using a slow cooker I tend to put it on overnight.

Once done, drain the liquid (make sure it’s not down the sink as I’ve sadly learnt one too many times).

This can be frozen or kept in the fridge for a couple of days.

So you’ve got SIBO…

I’ve had a stomach ache for 24 years.

What started as colic, then ‘just growing pains’, then a particularly nasty case of appendicitis, then a wheat intolerance, then type 2 diabetes quickly re-diagnosed as type 1 diabetes, then anorexia, then diabulimia, then post viral fatigue, then every food intolerance under the sun has finally been diagnosed as SIBO. Small intestine bacterial overgrowth. And I’m so relieved.

After a life time of pain, tiredness, discomfort and hiding behind baggy jumpers and a big scarf I finally know why.

My lovely parents tried all sorts when I was growing up, eliminating then testing certain foods from my diet, taking me to specialists and consultants all over the place, ferrying me back and forth from hospital and appointments. They were and still are incredible and amazingly supportive.

My pain has never really made sense, always ticking most but not all of the boxes of various things. We’ve been circling the idea of a leaky gut, autoimmune reactions, bad bacteria but never hit the nail on the head for years. Eventually I went and cried at a poor GP and he sent me off to the gastro clinic. For the first time in my life the consultant listened properly and then very confidently told me he was going to get me better.

He then sent me for every gastro test necessary, trust me you don’t need the details..

Finding the time to go to these appointments with a full time job in London and a husband who often works away overseas wasn’t easy. My friends were amazing at helping out and if I didn’t have an inappropriate amount of love for them already, I do now!

And now I have my answer. Sibo. And it’s treatable.

I’m now booked in to see my consultant and we’re going to get busy treating this beast. I feel so positive. I can finally get my life back.

For so many years I’ve felt trapped in a body that was shutting down and would never get better.

I lived my life having to go from work straight to bed and either leave social events early or not go at all. I removed all the mirrors in our house because I couldn’t face looking at my painful, bloated stomach. I wore a scarf to hide my stomach every day, even in the 34 degree heat. All food made me sick and I’d be melting into my desk at work even after the smallest of lunches from brainfog. I would be suffocated by the bloating of my own stomach pushing and restricting my lungs. Walking upstairs made my heart feel like it was going to collapse and don’t get me started on the guilt, depression and anxiety. I felt like such a burden on my lovely, supportive husband.

And now I can fix it all. No more hiding.

I’ve already started the recommended fodmap diet and after only 3 days my bloating has halved and I have energy. I feel like me again. It’s not an easy diet to follow but if it can do that much in 3 days then it’s worth it!

I’m so excited for what’s to come.

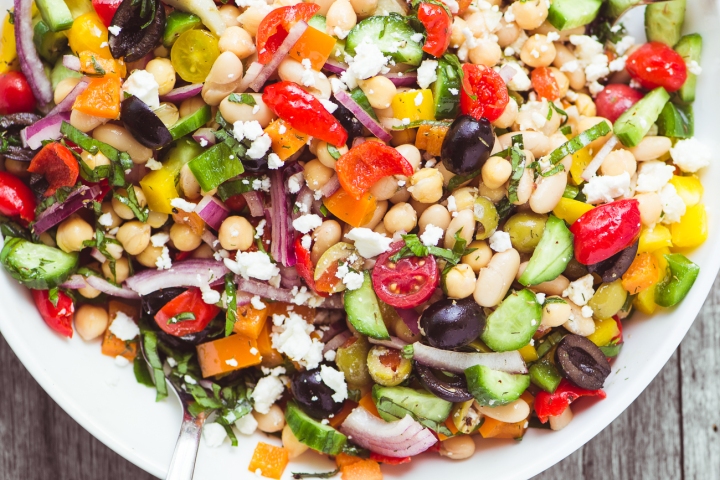
Gorgeous Greek bean salad

Gorgeous Greek bean salad

This is my take on a Greek salad. Light and fresh and full of healthy fats. It’s tasty and really cheap to make and works great as a side dish for bbqs or picnics. It also keeps well in the fridge so is perfect for meal prepping your week’s lunches! The fats and protein will keep you full for ages and it usually keeps me satisfied during a long afternoon at work and a train ride home.

Ingredients

  • 400g tin mixed beans or chickpeas
  • 400g reduced sugar baked beans, with the juice
  • 1 cucumber, cut into small chunks with the seeds removed
  • 1 cup of Black/kalamata olives
  • 1 red onion, finely sliced
  • 10 Cherry tomatoes, quartered
  • 1/2 tbsp dried oregano
  • 1 tbsp Olive oil
  • 50g Feta cheese, crumbled, optional
  • Black pepper, to taste

Method

Mix all of the ingredients together, including the juice from the baked beans as this will help make the dressing.

Serve chilled, it goes great with houmous and couscous for a quick and easy lunch!

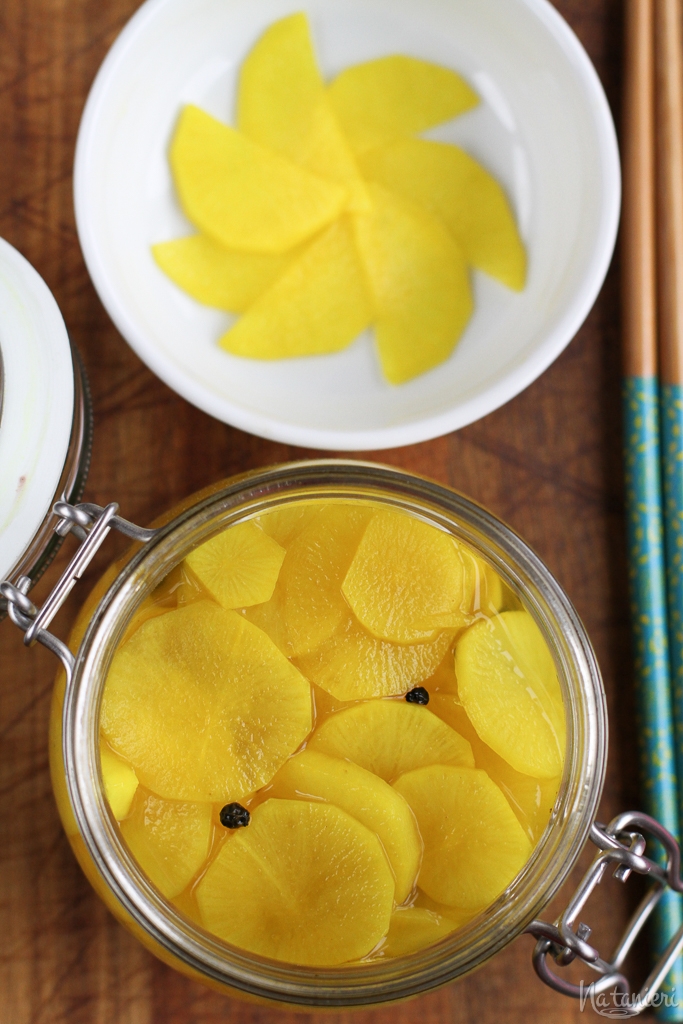
Bright yellow low fodmap, Korean pickles!

Bright yellow low fodmap, Korean pickles!

One of my favourite Korean side dishes is pickles! Bright yellow, sweet, sharp and refreshing! They’re super delicous and easy to make from home without any nasty artificial extras. They go so well on the side of some crispy Korean fried chicken or a bowl of comforting udon.

They’re also ridiculously inexpensive and easy to make, and have loads of nutrients like vitamin C, potassium, calcium, magnesium and iron. And of course, all types of radish are famously full of fiber.

I love them, and I think you just might too!

Ingredients

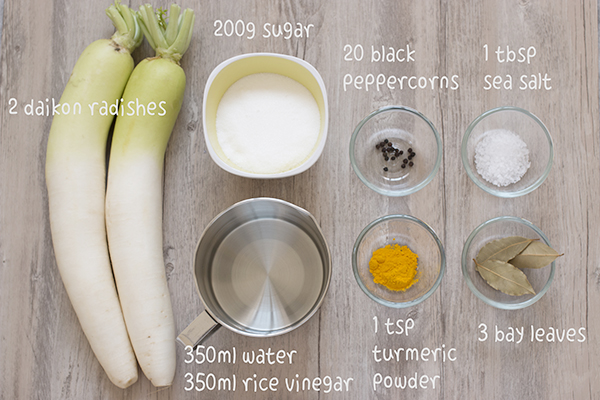
danmuji-ingredients

  • 1 1/2 cups (350ml) water
  • 1 1/2 cups (350ml) rice (or white)vinegar
  • 1/2 cup (200g) sugar
  • 1 tablespoon (15g) salt
  • 1 teaspoon turmeric powder
  • 20 whole black peppercorns
  • 3 bay leaves
  • 1 pound (450g) daikon (sometimes called mooli) radish, peeled and sliced

Method

In a medium saucepan, stir together water, vinegar, sugar, salt, turmeric, peppercorns, and bay leaves.

Bring to a boil over medium-high heat, stirring to ensure that sugar fully dissolves.

Remove from heat and add daikon.

Transfer pickles and brine to an airtight glass container and store in the refrigerator.

Pickles will last about 1 month.

Gluten and Dairy Free Pancakes

Lately this pancake has turned into somewhat of a craze in the health world as a super yummy, protein packed meal! They’re stupidly easy to make and taste exactly like normal pancakes (honestly!) with a hint of banana. This year I’ve had to give up having wheat and dairy in my diet and one of the worst parts was the thought of missing out on pancake day. Luckily a lovely friend of ours gave us this recipe and suddenly the world seemed a brighter place! I have tried a lot of substitute recipes in the past for different meals but this one has by far been the most impressive. I like to add a sprinkling of cinnamon and a few drops of vanilla essence to really make these pancakes stand out, but if I’m honest they’re perfection even without these extras.

I like to serve these the traditional way, with a sharp squeeze of lemon and a pinch of sugar, but they’d be great with a drizzle of maple syrup and hot, crispy bacon or anything else you may fancy!

260716265898805123_KC8gbgeA_c

 Serves 2-3 

Ingredients
1 mashed, super ripe banana
2 eggs

Method

Use a fork to mash the banana. In a separate bowl, whisk up the eggs then mix the two ingredients together (if you’re pushed for time you can use an electric whisk). If your want to add in any extras, such as cinnamon or vanilla, mix these in too! Next, prepare your pan by pouring in a little oil of your choice and putting it on a low/medium heat. Add your pancake mixture in your desired amount to the pan,then let it set for around 30 seconds (or when the middle starts to bubble) then flip it and fry for another 30(ish) seconds! Repeat until you have no mixture left. Serve with your favourite toppings and don’t be surprised if you decide to make some more for seconds!